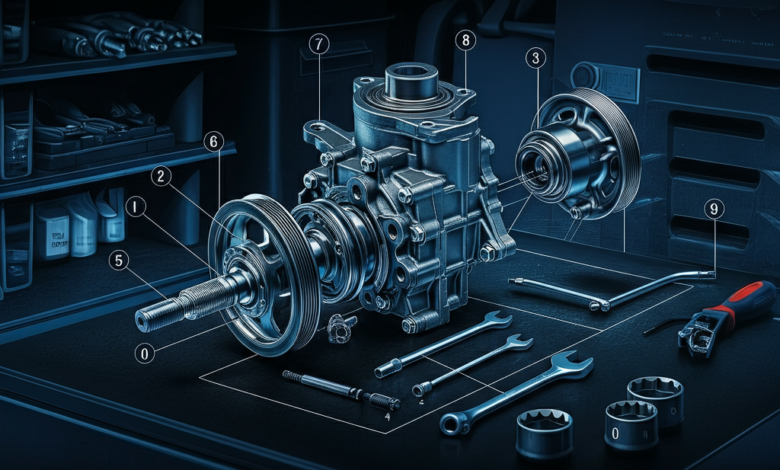
How to Take Apart an Evo 8 Power Steering Pump

The Mitsubishi Lancer Evolution 8 (Evo 8) is a gem among performance cars, but like any vehicle, regular maintenance is key to preserving its high-octane thrill. One component that occasionally requires attention is the power steering pump. Whether you’re dealing with leaks, noisy operation, or reduced performance, disassembling and inspecting the pump can help bring your steering system back to its prime.
This guide will walk you through the entire process, from disassembly to reassembly, so you can confidently handle your Evo 8 power steering pump. Please note, all necessary safety precautions and proper tools must be used to avoid damage or injury.
Tools and Materials You’ll Need
Before rolling up your sleeves, gather everything you’ll need to complete the job:
Tools:
- Socket set (metric)
- Wrenches (metric)
- Screwdrivers (flathead and Phillips)
- Rubber mallet
- Snap ring pliers
- Small pick set
- Torque wrench
- Drain pan
- Plastic bags or containers for organizing bolts and parts
Materials:
- Power steering fluid
- Degreaser or parts cleaner
- Lubricant/grease
- Replacement seals or O-ring kit (specific to Evo 8 power steering pumps)
- Workshop manual for torque specs (optional, but highly recommended)
Having these on hand will ensure a smoother, more efficient process. Labeling smaller components and organizing them as you disassemble the pump can save you from confusion later.
Step-by-Step Disassembly Guide
Ensure Safety First
- Disconnect your battery to prevent any accidental power-related incidents.
- Place the car on a flat, secure surface. If removing the pump from the car, ensure the vehicle is supported with jack stands, not just a jack.
- Wear gloves to protect your hands from sharp edges and power steering fluid.
Remove the Power Steering Pump from the Engine
- Place a drain pan under the pump to catch any leaking fluid.
- Disconnect the power steering fluid lines (both high-pressure and return lines) from the pump. Be prepared for residual fluid to drain out.
- Locate the mounting bolts securing the pump to the engine bracket. Using a socket wrench, carefully remove these bolts and set them aside.
- Gently remove the pump from the mounting bracket, taking care not to damage any surrounding components.
Begin Disassembly of the Pump
- Clean the exterior of the pump with degreaser to remove oil and debris. This will make handling and inspecting parts much easier.
- Use snap ring pliers to carefully remove the snap rings from the shaft housing and other components. These rings hold certain parts in place, so take it slow to avoid damage.
- Next, take off the front casing by removing the fasteners holding it in place. At this stage, you’ll start seeing the internal components.
- Remove the pulley, which is pressed onto the input shaft. Use a pulley puller tool to safely slide the pulley off the shaft.
- Take apart the internal components, including the vane pump assembly and housing. Organize these parts on a clean surface to keep track of their order and orientation.
Use photos or diagrams from a workshop manual if needed to ensure accuracy during this process.
Inspecting the Components
Now that you’ve disassembled the pump, it’s time to carefully inspect each part for wear or damage:
- Seals and O-Rings: Look for cracks, distortion, or hardening. These should always be replaced during a rebuild.
- Pulley and Shaft: Check for bends, cracks, or excessive wear that could compromise functionality.
- Pump Housing: Ensure there are no scratches, gouges, or damage that could prevent a proper seal.
- Vanes and Rotor: Inspect the rotor and vane blades for uneven wear. Damaged blades can reduce pump efficiency and cause noise.
If you notice signs of severe wear or damage, replacing the affected parts (or even the entire pump) may be more cost-effective than a rebuild.
Reassembly Instructions
Once you’ve cleaned, inspected, and replaced any damaged parts, it’s time to reassemble the pump. Follow these steps carefully, making use of your workshop manual for reference:
Reinstall Internal Components
- Reinsert the vane and rotor assembly into the housing, ensuring they are properly aligned.
- Attach the front casing back over the vane assembly. Secure the casing with the appropriate fasteners.
Reinstall the Pulley
- Press the pulley back onto the input shaft using a pulley installation tool. Ensure it’s secure but aligned correctly to prevent wobbling.
Replace Seals and Snap Rings
Install new seals or O-rings onto the pump. Use lubricant as needed to ensure a proper fit. Carefully secure the snap rings back into place using snap ring pliers.
Mount the Pump Back to the Engine
Reverse the initial removal process to reinstall the pump on the vehicle.
- Secure the pump onto the mounting bracket using the original bolts. Torque them to the specifications provided in your Evo 8 workshop manual.
- Reconnect the power steering fluid lines and secure them properly.
- Refill the power steering reservoir with fresh fluid, and bleed the steering system to remove air bubbles.
Tip: Air in the system can cause poor performance and noisy operation, so make sure to bleed it thoroughly.
Troubleshooting Common Issues
After reassembly, you may encounter some common problems. Here’s how to address them:
- Noise During Operation: Check for air in the system; bleed the power steering lines again.
- Persistent Leaks: Inspect fluid lines for damage and ensure all seals and connections are properly tightened.
- Stiff Steering: Verify fluid levels and confirm that all internal components are installed correctly.
If the issue persists, you may need to revisit your assembly process or consult a professional mechanic.
Final Thoughts
Taking apart an Evo 8 power steering pump might seem intimidating at first, but with the right tools, preparation, and careful attention to detail, it’s a manageable task even for DIY mechanics. Regular maintenance on this component can extend its lifespan and save you from expensive replacements while ensuring your steering system operates smoothly.


